We already had one Web version of a SPOT Parser, we now have one embedded in the Navigation Console.
It allows the manipulation of the SPOT bulletins even if you are far from the Internet...
It also comes with a possibility to compose your own SPOT request.
At sea, you would compose your request (possibly with the data from the GPS), paste it into your Airmail client to send it through SailMail.
Once the response is in your inbox, you paste it in the utility featured above, and you have a graphical rendering of the SPOT data.
Enjoy!
Tuesday, March 25, 2014
Wednesday, December 18, 2013
Introducing the Headless Weather Wizard
Two things:
You just need to run it this way:
On Windows:
On Linux:
Notice the parameters
This means that the pattern mentioned in
- The Weather Wizard runs on a Raspberry PI
- It can load (and save) a default composite, and reload it on a regular base
You just need to run it this way:
On Windows:
set MEM_OPTIONS=-XX:NewSize=512m -XX:MaxNewSize=512m -Xmn768m -Xms1024m -Xmx1024m set MEM_OPTIONS=%MEM_OPTIONS% -XX:SurvivorRatio=1 -XX:PermSize=30m -XX:+UseParallelGC set JAVA_OPTIONS=%EXTRA_JVM_PRM% %MEM_OPTIONS% %JAVA_OPTIONS% :: set PRMS=-composite:./patterns/01.Favorites/01.3.00.Pacific.Sfc.500.Tropic.GRIB.ptrn set PRMS=%PRMS% -interval:360 set PRMS=%PRMS% "-pattern:/yyyy/MM-MMM | Auto_ | yyyy_MM_dd_HH_mm_ss_z | waz" :: set command=java %JAVA_OPTIONS% -client -classpath "%CP%" -Dheadless=true main.splash.Splasher %PRMS% start "Headless Weather Wizard" %command%
MEM_OPTIONS=-XX:NewSize=512m -XX:MaxNewSize=512m -Xmn768m -Xms1024m -Xmx1024m MEM_OPTIONS=$MEM_OPTIONS -XX:SurvivorRatio=1 -XX:PermSize=30m -XX:+UseParallelGC JAVA_OPTIONS=$EXTRA_JVM_PRM $MEM_OPTIONS $JAVA_OPTIONS # PRM1=-composite:./patterns/01.Favorites/01.3.00.Pacific.Sfc.500.Tropic.GRIB.ptrn PRM2=-interval:360 PRM3="-pattern:/yyyy/MM-MMM | Auto_ | yyyy_MM_dd_HH_mm_ss_z | waz" # java $JAVA_OPTIONS -client -classpath "$CP" -Dheadless=true main.splash.Splasher $PRM1 $PRM2 "$PRM3" &
-composite:, -interval:, and -pattern:.
Same for the System variable -Dheadless=true.
This means that the pattern mentioned in
-composite: will be reloaded every 360 minutes, and stored as stated in the -pattern: parameter.
Labels:
fax,
grib,
headless,
meteo,
Raspberry Pi,
sailing,
Weather Wizard
Monday, December 16, 2013
Introducing Console User-Exits
There are many things to do with the NMEA Data available in the cache, and the console
is just doing a little - obvious - part of them.
In order for the users to implement their own features and ideas, we now provide a "user-exit" mechanism.
The user-exits are to be written in Java, and implement a specific interface named
It could probably not be any simpler.
Here is a simple implementation of this interface. This one evaluates the True Wind Speed every time a sentence is received from the NMEA station, and displays a message if the TWS is above 10 knots.
See how the
You have an internet connection on the boat, it is docked or anchored in the harbor.
From wherever you are, you want to know what the wind is like where the boat is.
This user-exit monitors the True Wind Speed (TWS), and send an email when it is above a given threshold. It looks at the wind speed every X minutes, the X comes from a configuration file (
All the sources of this example.
Possibilities are endless. The limit is your imagination.
Combining the two examples above, you can as well gather all the data into a single document (XML, json, etc), and send it through email on a regular base, so it can be rendered by the receipient.
Etc, etc...
In order for the users to implement their own features and ideas, we now provide a "user-exit" mechanism.
The user-exits are to be written in Java, and implement a specific interface named
olivsoftdesktop.DesktopUserExitInterface,
and defined as foillow:
1 package olivsoftdesktop;
2
3 public interface DesktopUserExitInterface
4 {
5 public void start();
6 public void stop();
7 public void describe();
8 }
A Simple User-exit implementation
To develop your own features, you would need to put - at least - into your classpath:desktop.jar
nmeaparser.jarnmeareader.jarcoreutilitiesgeomutil.jar
Here is a simple implementation of this interface. This one evaluates the True Wind Speed every time a sentence is received from the NMEA station, and displays a message if the TWS is above 10 knots.
See how the
NMEAReaderListener is registered.
1 package olivsoftdesktop.sampleue;
2
3 import nmea.event.NMEAReaderListener;
4 import nmea.server.ctx.NMEAContext;
5 import nmea.server.ctx.NMEADataCache;
6 import ocss.nmea.parser.Angle360;
7 import ocss.nmea.parser.Speed;
8 import olivsoftdesktop.DesktopUserExitInterface;
9
10 public class UserExitSample
11 implements DesktopUserExitInterface
12 {
13 public UserExitSample()
14 {
15 super();
16 }
17
18 @Override
19 public void start()
20 {
21 System.out.println("User exit is starting...");
22 NMEAContext.getInstance().addNMEAReaderListener(new NMEAReaderListener()
23 {
24 @Override
25 public void manageNMEAString(String nmeaString)
26 {
27 // System.out.println(" ... From user exit, got NMEA Data [" + nmeaString + "]");
28 NMEADataCache dc = NMEAContext.getInstance().getCache();
29 double tws = ((Speed) dc.get(NMEADataCache.TWS)).getValue();
30 double twd = ((Angle360) dc.get(NMEADataCache.TWD)).getValue();
31 if (tws > 10 && !Double.isInfinite(tws))
32 {
33 System.out.println("Wind is over 10 kts:" + tws + ", TWD:" + twd);
34 // TODO Send an email...
35 }
36 }
37 });
38 }
39
40 @Override
41 public void stop()
42 {
43 System.out.println("Terminating User exit");
44 }
45
46 @Override
47 public void describe()
48 {
49 System.out.println("This is a simple user-exit example that shows howto register an NMEAReaderListener from your code.");
50 }
51 }
User-exit runtime
To have your user-exit to be taken care if, you need to:-
Archive it in a jar-file, and put the jar (along with the ones it may depend on) in one of the following directories
all-user-exits(recommended)all-libsall-3rd-party
-
Mention the name of the user-exit in the command-line parameters, like
-ue:myspecial.feature.SuperUserExit. For the example above, the parameter would be-ue:olivsoftdesktop.sampleue.UserExitSample.
A more complex sample
Here is the scenario:You have an internet connection on the boat, it is docked or anchored in the harbor.
From wherever you are, you want to know what the wind is like where the boat is.
This user-exit monitors the True Wind Speed (TWS), and send an email when it is above a given threshold. It looks at the wind speed every X minutes, the X comes from a configuration file (
email.properties) that can be edited.
1 package olivsoftdesktopuserexits;
2
3 import java.io.FileInputStream;
4 import java.text.DecimalFormat;
5 import java.text.SimpleDateFormat;
6 import java.util.Calendar;
7 import java.util.Date;
8 import java.util.Properties;
9 import java.util.TimeZone;
10 import nmea.server.ctx.NMEAContext;
11 import nmea.server.ctx.NMEADataCache;
12 import ocss.nmea.parser.Angle360;
13 import ocss.nmea.parser.GeoPos;
14 import ocss.nmea.parser.Speed;
15 import ocss.nmea.parser.UTCDate;
16 import olivsoftdesktop.DesktopUserExitInterface;
17 import olivsoftdesktopuserexits.emailutil.EmailSender;
18
19 public class DesktopEmailSender
20 implements DesktopUserExitInterface
21 {
22 private final static SimpleDateFormat SDF = new SimpleDateFormat("yyyy-MMM-dd HH:mm:ss");
23 private final static DecimalFormat DF22 = new DecimalFormat("##0.00 'kts'");
24 private final static DecimalFormat DF30 = new DecimalFormat("##0'\272'");
25 private static String SEND_PROVIDER = "google";
26 private Thread watcher = null;
27 private boolean keepWatching = true;
28 private EmailSender sender = null;
29
30 private double windThreshold = -1;
31 private long betweenLoops = 600 * 1000L; // 10 minutes default
32
33 public DesktopEmailSender()
34 {
35 super();
36 }
37
38 @Override
39 public void start()
40 {
41 System.out.println("Method 'start':" + this.getClass().getName() + " User exit is starting...");
42 Properties props = new Properties();
43 String propFile = "email.properties";
44 try
45 {
46 FileInputStream fis = new FileInputStream(propFile);
47 props.load(fis);
48 }
49 catch (Exception e)
50 {
51 System.err.println("email.properies file problem..., from " + System.getProperty("user.dir"));
52 throw new RuntimeException("File not found:email.properies");
53 }
54 SEND_PROVIDER = props.getProperty("ue.preferred.provider", SEND_PROVIDER);
55 sender = new EmailSender(SEND_PROVIDER);
56 try
57 {
58 windThreshold = Double.parseDouble(props.getProperty("ue.wind.threshold"));
59 System.out.println("Will send emails when the wind is above [" + windThreshold + "]");
60 }
61 catch (NumberFormatException nfe)
62 {
63 throw new RuntimeException("Bad wind threshold:" + props.getProperty("ue.wind.threshold"));
64 }
65 try
66 {
67 betweenLoops = Long.parseLong(props.getProperty("ue.between.loops.in.minute"));
68 }
69 catch (NumberFormatException nfe)
70 {
71 throw new RuntimeException("Bad Loop interval:" + props.getProperty("ue.between.loops.in.minute"));
72 }
73 final long _betweenLoops = betweenLoops;
74 watcher = new Thread()
75 {
76 private boolean started = false;
77 private final long BETWEEN_LOOPS = _betweenLoops * 60 * 1000;
78 private final long TEN_SECONDS = 10000L;
79 private long waitTime = BETWEEN_LOOPS;
80 public void run()
81 {
82 while (keepWatching)
83 {
84 waitTime = BETWEEN_LOOPS;
85 NMEADataCache dc = NMEAContext.getInstance().getCache();
86 try
87 {
88 double tws = ((Speed) dc.get(NMEADataCache.TWS)).getValue();
89 double twd = ((Angle360) dc.get(NMEADataCache.TWD)).getValue();
90 String date = "";
91 UTCDate utcDate = (UTCDate)NMEAContext.getInstance().getCache().get(NMEADataCache.GPS_DATE_TIME);
92 if (utcDate != null && utcDate.getValue() != null)
93 {
94 Date d = utcDate.getValue();
95 Calendar cal = Calendar.getInstance();
96 cal.setTime(d);
97 cal.setTimeZone(TimeZone.getTimeZone("Etc/UTC"));
98 date = SDF.format(cal.getTime());
99 }
100 String pos = "";
101 try { pos = ((GeoPos)dc.get(NMEADataCache.POSITION)).toString(); } catch (Exception ex) {}
102 if (!started)
103 {
104 started = true;
105 System.out.println(" -- User exit started for good.");
106 }
107 if (tws > windThreshold && !Double.isInfinite(tws))
108 {
109 String alertMessage =
110 (date.trim().length() > 0 ? "Date:" + date + "\n": "") +
111 (pos.trim().length() > 0 ? "Pos:" + pos + "\n" : "") +
112 "Wind is over " + DF22.format(windThreshold) + ":" + DF22.format(tws) + ", TWD:" + DF30.format(twd);
113 System.out.println(alertMessage);
114 // Send an email...
115 try
116 {
117 sender.send(alertMessage);
118 System.out.println("Email sent.");
119 }
120 catch (Exception ex)
121 {
122 System.err.println("Sending email failed through [" + SEND_PROVIDER + "]");
123 ex.printStackTrace();
124 }
125 }
126 }
127 catch (NullPointerException npe)
128 {
129 // Just wait til next time...
130 System.out.println("Cache not initialized (yet)");
131 waitTime = TEN_SECONDS;
132 }
133 synchronized (this)
134 {
135 System.out.println(" ...User exit going to wait, at " + new Date().toString() + " (will wait for " + (waitTime / 1000) + " s)");
136 try { wait(waitTime); }
137 catch (InterruptedException ie)
138 {
139 System.out.println("Told to stop!");
140 keepWatching = false;
141 }
142 }
143 }
144 System.out.println("Stop waiting.");
145 }
146 };
147 keepWatching = true;
148 watcher.start();
149 }
150
151 @Override
152 public void stop()
153 {
154 System.out.println(this.getClass().getName() + " is terminating");
155 keepWatching = false;
156 synchronized (watcher)
157 {
158 watcher.notify();
159 }
160 }
161
162 @Override
163 public void describe()
164 {
165 System.out.println("Polls the NMEA Cache on a regular base, and sends an email if the TWS is above a given threshold.");
166 System.out.println("Driven by a properties file named email.properties, in the all-scripts directory.");
167 }
168 }
Possibilities are endless. The limit is your imagination.
Combining the two examples above, you can as well gather all the data into a single document (XML, json, etc), and send it through email on a regular base, so it can be rendered by the receipient.
Etc, etc...
How to do it for yourself, step by step
- Download all the sources, in the zip mentionned above
- Extract it is a new clean directory
- Make sure the jar
mail.jaris in yourall-3rd-partydirectory - Make sure you have installed a JDK in your environment
- In a system console, navigate to the directory where you unzipped the sources
- If it does not exist, create a
classesdirectory. Make sure it is empty -
Compile the code:
On WindowsOn LinuxPrompt> set OLIV_HOME=D:\OlivSoft Prompt> set CP=%OLIV_HOME%\all-3rd-party\mail.jar Prompt> set CP=%CP%;%OLIV_HOME%\all-libs\nmeaparser.jar Prompt> set CP=%CP%;%OLIV_HOME%\all-libs\nmeareader.jar Prompt> set CP=%CP%;%OLIV_HOME%\all-libs\desktop.jar Prompt> set CP=%CP%;%OLIV_HOME%\all-libs\geomutil.jar Prompt> javac -d classes -sourcepath src -cp %CP% src\olivsoftdesktopuserexits\*.javaMake sure you do not see any error.Prompt> bash Prompt> OLIV_HOME=/usr/OlivSoft Prompt> CP=$OLIV_HOME/all-3rd-party/mail.jar Prompt> CP=$CP:$OLIV_HOME/all-libs/nmeaparser.jar Prompt> CP=$CP:$OLIV_HOME/all-libs/nmeareader.jar Prompt> CP=$CP:$OLIV_HOME/all-libs/desktop.jar Prompt> CP=$CP:$OLIV_HOME/all-libs/geomutil.jar Prompt> javac -d classes -sourcepath src -cp $CP src/olivsoftdesktopuserexits/*.java -
Archive the generated classes:
On WindowsOn LinuxPrompt> cd classes Prompt> jar -cvf ..\emailUserExit.jar *Prompt> cd classes Prompt> jar -cvf ../emailUserExit.jar * -
Copy the archive in the
all-user-exitsdirectory
On WindowsOn LinuxPrompt> cd .. Prompt> copy *.jar %OLIV_HOME%\all-user-exitsCopyPrompt> cd .. Prompt> cp *.jar $OLIV_HOME/all-user-exitsemail.propertiesin theall-scriptsdirectory
On WindowsOn LinuxPrompt> copy email.properties %OLIV_HOME%\all-scriptsYou are almost done...Prompt> cp email.properties $OLIV_HOME/all-scripts -
Modify the line that starts the console, so it takes your work in account:
On WindowsOn Linuxset COMMAND=java %JAVA_OPTIONS% -classpath %CP% olivsoftdesktop.OlivSoftDesktop %HEADLESS_OPTIONS% -ue:olivsoftdesktopuserexits.DesktopEmailSender start "Headless Console (User-Exit)" %COMMAND%That's it!java $JAVA_OPTIONS -classpath $CP olivsoftdesktop.OlivSoftDesktop $HEADLESS_OPTIONS -ue:olivsoftdesktopuserexits.DesktopEmailSender &
Important: Do not forget to edit and modifyemail.properties, so it matches your environment, and your needs.
Labels:
console,
Navigatrix,
NMEA,
OlivSoft,
Raspberry Pi,
UserExit
Monday, November 18, 2013
Multiple Access, for real
Now we've setup the ad-hoc network from the Raspberry PI reading the NMEA Data, we can simultaneously access the data, from several devices connected on the ad-hoc network defined on the boat, from the Raspberry PI itself:
A small glitch I need to address: Android does not want to connect to an ad-hoc network. I need to fix that, more to come soon.
Swing Console from a laptop
OpenCPN from a laptop
HTML Console from a laptop
HTML Console from an iPad
HTML Console from an iPhone
All the pictures above were taken with all the programs on the devices running simultaneously.
A small glitch I need to address: Android does not want to connect to an ad-hoc network. I need to fix that, more to come soon.
Saturday, November 9, 2013
NMEA with Raspberry PI: All Good!
The last step - after this one - was not as straight forward. But finally, everything works fine.
The idea was to use PI4J to read the serial port (
But as reading a USB port (
The NMEA Console and OpenCPN can use TCP to get the data, The html5 Console uses HTML..., everything goes seamlessly. For less than 700mA. And around $50.
We will detail later all the steps to go through to get this done anywhere. This is just an easy check list.
And we'll built a nice box to host all this. The Raspberry, an optional small screen, and possibly a small keyboard.
More soon.
And just to give you a taste of what will come next,node.js works like a charm on the Raspberry PI, and the WebSocket protocol works as if it had been designed for this platform... That is going to seriously rock.
The main points this project addresses:
So, here is the story:
The SD card containing the OS of the PI needs to be 4Gb big, minimal recommended. Mine is 8, and it can go beyond 32. This allows DAYS of logging.
Now, when a device from the boat wants to see what's going on (i.e. visualize the data), it connects to the boat's ad-hoc network. Then, depending on its possibilities and needs, it can use the NMEA Console (that one can read any channel for its data input), or the HTML5 Console (at the bottom of this page).
The chart plotting program (like OpenCPN) can use the exact same data stream.
And when you're done watching your device, you can turn it off, hibernate it, what not, the RaspPi keeps reading and broadcasting.
The RaspPi does not take more than 700mA.
And it costs less than $50.
The RaspPi does not need any keyboard or screen. (I use SSH from a laptop to start the reading program on it).
The main points are:
I was very interested during the recent America's Cup, to see all the crews watching several kind of devices..., many had those displays on their fore-arms, tacticians had some iPad-like devices, fasten on their bellies with some shock-cords and velcro..., it kind of rang a bell! Those boats had for sure way more sensors that just an NMEA station (up to 3000 sensors for Oracle, I heard), but I believe that there is already a LOT to do with the data you can get from a regular NMEA station.
Once the ad-hoc network is setup, the crew members can even use their smart phone to access it, and visualize the HTML5 Console. That actually enhances one point: All the technology is here - nothing has been built or invented specially for this project. It's all about getting access to it with existing devices and techniques. Everyone (including me!) now has a smartphone, Linux has been around for ages, NMEA is one of the (if not THE) oldest standards in IT... And again, a small device you can get for less that $50 makes it all possible!
I like that.
The idea was to use PI4J to read the serial port (
/dev/ttyAMA0). All the tests I made with PI4J were all very positive, but apparently, there is a bug when the baud rate is 4800. And unfortunately, this is the one we need.
But as reading a USB port (
/dev/ttyUSB0) was not a problem, a simple adapter (serial 9 pin to USB) fixed everything. And on Linux (Raspberry PI runs Linux, a tweaked version of Debian), no driver or any such thing is required. Plug it in, and boom! It works.
The Raspberry PI reads the serial port with the headless console, and rebroadcasts everything appropriately.
The NMEA Console and OpenCPN can use TCP to get the data, The html5 Console uses HTML..., everything goes seamlessly. For less than 700mA. And around $50.
We will detail later all the steps to go through to get this done anywhere. This is just an easy check list.
And we'll built a nice box to host all this. The Raspberry, an optional small screen, and possibly a small keyboard.
More soon.
And just to give you a taste of what will come next,node.js works like a charm on the Raspberry PI, and the WebSocket protocol works as if it had been designed for this platform... That is going to seriously rock.
To summarize
This project goes along with the NMEA console, found here.The main points this project addresses:
- Serial ports (most of the data we're interested in come through a serial port) are accessed exclusively. Only one program at a time can access the data. I had the problem on the ketch, when the cartography soft was accessing the data port (to plot the boat on the chart), the console (the one evaluating current and performances) had to wait.
- The laptop you can use to read the data draws a substantial amount of electricity (around 10W is not unusual).
- Several devices on the boat (tactician, driver, navigator, trimmers) might need to have simultaneous access to the data, and they might need to be already processed and smoothed (damped)
So, here is the story:
- The Raspberry PI creates its own ad-hoc network when it boots, and you start on it a utility that reads the data from the serial (or whatever) port connected to the NMEA station
- The data are read, and stored on the raspberry in some cache (a hashmap).
- The data are logged (optional), and processed (true wind is calculated, current is evaluated, VMG - on the wind or on the mark, performance, are evaluated). Those data are cached as well. Those calculations require some parameters to be set (max leeway, deviation curves, polars of the boat, some coefficients for the instruments, etc), they are available on the Raspberry PI.
- The data rebroadcasted on TCP, UDP, and HTML (also possibly RMI; I dropped GPSd). You can select one or more of those channels for rebroadcasting.
The SD card containing the OS of the PI needs to be 4Gb big, minimal recommended. Mine is 8, and it can go beyond 32. This allows DAYS of logging.
Now, when a device from the boat wants to see what's going on (i.e. visualize the data), it connects to the boat's ad-hoc network. Then, depending on its possibilities and needs, it can use the NMEA Console (that one can read any channel for its data input), or the HTML5 Console (at the bottom of this page).
The chart plotting program (like OpenCPN) can use the exact same data stream.
And when you're done watching your device, you can turn it off, hibernate it, what not, the RaspPi keeps reading and broadcasting.
The RaspPi does not take more than 700mA.
And it costs less than $50.
The RaspPi does not need any keyboard or screen. (I use SSH from a laptop to start the reading program on it).
The main points are:
- Low consumption (and low price, if it makes any sense in this context)
- Data rebroadcasting
-
Logging (ages of logging).
I log VWR, RMC, MWV, RMB, VHW, VLW, HDG, MTW and GLL. It's about 1 Mb per hour.
One day would be 24 Mb. One week around 168 Mb. Peanuts.
I was very interested during the recent America's Cup, to see all the crews watching several kind of devices..., many had those displays on their fore-arms, tacticians had some iPad-like devices, fasten on their bellies with some shock-cords and velcro..., it kind of rang a bell! Those boats had for sure way more sensors that just an NMEA station (up to 3000 sensors for Oracle, I heard), but I believe that there is already a LOT to do with the data you can get from a regular NMEA station.
Once the ad-hoc network is setup, the crew members can even use their smart phone to access it, and visualize the HTML5 Console. That actually enhances one point: All the technology is here - nothing has been built or invented specially for this project. It's all about getting access to it with existing devices and techniques. Everyone (including me!) now has a smartphone, Linux has been around for ages, NMEA is one of the (if not THE) oldest standards in IT... And again, a small device you can get for less that $50 makes it all possible!
I like that.
Friday, November 8, 2013
Tropical phenomenons, Pacific, fall 2013
We've had quite a few tropical phenomenons in the Pacific since the end of August...
Here is a list - still open - of what we've had, along with the time they were active, and their highest strength.
Wind speeds are in knots. 60 G 75 is to be read 60 knots, gusting 75 knots.
As a reminder, a hurricane (force 12 on the Beaufort scale) is over 64 knots.
Over 64 knots, it's a Category One hurricane.
Over 82 knots, it's a Category Two hurricane.
Over 95 knots, it's a Category Three hurricane.
Over 112 knots, it's a Category Four hurricane.
Over 136 knots, it's a Category Five hurricane.
Hurricanes and Typhoons are similar phenomenons. Hurricanes belong to the East Pacific, Typhoons to the West Pacific.
We also note that the Beaufort scale does not mention any such thing as a "Super Storm". You have Storm, Violent Storm, and Hurricane...
"Super Storm" is something invented by some journalists.
| Sep 01-02 | TS Kiko, 60 G 75 |
| Sep 13-16 | TS Man-Yi, 60 G 75 |
| Sep 17-18 | Typhoon Usagi, 65 G 80 |
| Sep 13-16 | TS Man-Yi, 60 G 75 |
| Sep 19 | Hurricane Manuel, 65 G 80 |
| Sep 21-27 | Typhoon Pabuk, 90 G 110 |
| Oct 01-04 | Typhoon Fitow, 85 G 105 |
| Oct 04-06 | Typhoon Danas, 95 G 115 |
| Oct 11-16 | Typhoon Wipha, 115 G 140 |
| Oct 16-30 |
Super Typhoon Francisco, 140 G 170 Super Typhoon Lekima, 140 G 170, Hurricane Raymond, 95 G 105 |
| Nov 04-now | Super Typhoon Haiwan, 165 G 200 |
Over 64 knots, it's a Category One hurricane.
Over 82 knots, it's a Category Two hurricane.
Over 95 knots, it's a Category Three hurricane.
Over 112 knots, it's a Category Four hurricane.
Over 136 knots, it's a Category Five hurricane.
Hurricanes and Typhoons are similar phenomenons. Hurricanes belong to the East Pacific, Typhoons to the West Pacific.
We also note that the Beaufort scale does not mention any such thing as a "Super Storm". You have Storm, Violent Storm, and Hurricane...
"Super Storm" is something invented by some journalists.
Thursday, November 7, 2013
For Navigatrix users of the WeatherWizard
Apparently, the soft has been installed as root, and some write permissions are not granted to everyone.
That makes it difficult to write on the file system, like when downloading a file!
To fix that, you need to go to a Console, and enter the following commands:
That's a bit cryptic, but that should work!
That makes it difficult to write on the file system, like when downloading a file!
To fix that, you need to go to a Console, and enter the following commands:
Prompt> cd /opt/WeatherWizard
Prompt> sudo find . -name '*' -exec chown $USER {} \;
You might as well change the group of the same files.
If your group is "mygrp", then just type:
Prompt> cd /opt/WeatherWizard
Prompt> sudo find . -name '*' -exec chgrp mygrp {} \;
Be careful, all characters are important.
That's a bit cryptic, but that should work!
Monday, November 4, 2013
From Scratch to NMEA Re-broadcasting on TCP, with a Raspberry PI
This post will demonstrate how to connect a Raspberry PI on some NMEA input - a GPS in this case - to re-broadcast all its data using other protocols, HTTP and TCP in this case.
The cool thing about this configuration is that:
We assume that you already have a Raspberry PI, along with its power supply (AC or DC, whatever).
We will show how to setup everything so the Raspberryt PI reads the NMEA data, and re-broadcasts them. As an example, we will show how to consume them from OpenCPN.
We will also need to edit several configuration files and other scripts. You can use any editor you wish, "nano" can do the job, I myself prefer "vi". At the end of the day, that's the same, only the result is important.
Next, we will require several softwares to be installed on the Raspberry PI, some are necessary, others are convenient.
To install, type:
Just type:
Make sure you have the last version of the soft, up to date.
It is available on Google Code, in the download section.
The best way to do that is probably to install it on a box connected to the internet, and to let the software update itself.
Then you can transfer all the directory where it is installed (using FTP) on the Raspberry PI.
Once this is done, navigate to the
You can add a line in the menu:
We will see below how to start the program.
Make a backup:
Restart
Then we might need a DHCP Server:
Let's if that's true.
Notice in the steps above, that there is no mouse, no keyboard, and no screen connected on the Raspberry PI. We could have done so. But we didn't.
To demonstarte the full compatibility of this scenario, we will do the subsequent operations from a Windows box.
Then, we will use ssh (PuTTY) to start the re-broadcast: Connect with your username (default: pi) and password (default: raspberry), and cd to
To stop it:
Re-connect on the Raspberry PI with
Find the process, by typing:
The process being up and running, define a network connection in OpenCPN: Notice the Address, the one you have defined.
Click Apply... See the top right, the GPS is connected. As you can see in the NMEA log.
You can connect like this with as many devices as you want.
Voilà!
Next, we will try with the full NMEA station, with Pi4j. Then the HTML5 console will also be available, from http://192.168.1.1:9999/html5/console.html.
The cool thing about this configuration is that:
- As many devices as you want can access the NMEA data
- The Raspberry PI only draws 700 mA
- When they're done using rthe NMEA data, devices (laptops, tablets...) can shutdown, the NMEA data will still be read and available whenever a device connects on the Raspberry Pi's network
We assume that you already have a Raspberry PI, along with its power supply (AC or DC, whatever).
We will show how to setup everything so the Raspberryt PI reads the NMEA data, and re-broadcasts them. As an example, we will show how to consume them from OpenCPN.
We will also need to edit several configuration files and other scripts. You can use any editor you wish, "nano" can do the job, I myself prefer "vi". At the end of the day, that's the same, only the result is important.
Requirements
First, flash the SD card, as explained here. I used the Raspbian image. Comes with Java.Next, we will require several softwares to be installed on the Raspberry PI, some are necessary, others are convenient.
An FTP server
This one will be very convenient when you will need to transfer files on you Raspberry PI.To install, type:
Prompt> sudo apt-get install vsftpd
Then edit (sudo edit) /etc/vsftpd.conf:
anonymouse_enable=NO
local_enable=YES
write_enable=YES
local_umask=022
chroot_local_user=YES
user_sub_token=$USER
local_root=/home/$USER/ftp
Start this ftp as a service on the PI:
Prompt> sudo service vsftpd restart
Install RXTX Java libraries
Read this good article.Just type:
Prompt> sudo apt-get install librxtx-java
We will see in the next section what to do with this.
Fing
A very cool utility. Combination of Find and Ping.
Prompt> wget http://www.overlooksoft.com/packages/download?plat=arm
Prompt> sudo dpkg -i overlook-fing-2.3.deb
Prompt> sudo apt-get install libpcap*
and finally:
Prompt> sudo fing
OlivSoft
You have just installed the libraries you need to use the serial ports (Serial or USB), now we need to modify the launching script to take that in account.Make sure you have the last version of the soft, up to date.
It is available on Google Code, in the download section.
The best way to do that is probably to install it on a box connected to the internet, and to let the software update itself.
Then you can transfer all the directory where it is installed (using FTP) on the Raspberry PI.
Once this is done, navigate to the
all-scripts directory, and edit the script named olivsoft.
You can add a line in the menu:
echo \| P for Weather Wizard, with http proxy
echo \| S for NMEA Sniffer
echo \| H for Headless NMEA Console
echo \| POL for Polar Tool
... and then the corresponding execution definition:
...
elif [ $choice = "H" ] || [ $choice = "h" ]
then
JAVA_OPTIONS="$JAVA_OPTIONS -Dverbose=false"
JAVA_OPTIONS="$JAVA_OPTIONS -Dheadless=yes"
JAVA_OPTIONS="$JAVA_OPTIONS -Dserial.port=/dev/ttyUSB0"
JAVA_OPTIONS="$JAVA_OPTIONS -Djava.library.path=/usr/lib/jni"
#
HEADLESS_OPTIONS="-output=HTTP:9999"
HEADLESS_OPTIONS="$HEADLESS_OPTIONS -output=TCP:7001"
# HEADLESS_OPTIONS="$HEADLESS_OPTIONS -output=FILE:.\logged-data\headless.nmea
java -client -Xms512m -Xmx1024m -classpath $CP $JAVA_OPTIONS olivsoftdesktop.OlivSoftDesktop $HEADLESS_OPTIONS
elif ...
Notice that /dev/ttyUSB0 is the USB port the GPS in connected on. In this case, the data will be re-broadcasted on TCP, port 7001, as well as on HTTP port 9999.
We will see below how to start the program.
Create an ad-hoc network, from the Raspberry PI
Read this good article.Make a backup:
Prompt> sudo cp /etc/network/interfaces /etc/network/interfaces_backup
Then edit (sudo edit) /etc/network/interfaces:
auto lo iface lo inet loopback iface eth0 inet dhcp auto wlan0 iface wlan0 inet static address 192.168.1.1 netmask 255.255.255.0 wireless-channel 1 wireless-essid RPiOnTheBoat wireless-mode ad-hocIn the lines above,
RPiOnTheBoat will be the name of your ad-hoc network.
Restart
wlan0 (wlan0 is the name of the wireless network interface).
Prompt> sudo ifdown wlan0
Prompt> sudo ifup wlan0
(reboot in case you have an error message)
Then we might need a DHCP Server:
Prompt> sudo apt-get update
Prompt> sudo apt-get install dhcp3-server
Then edit (sudo edit) /etc/dhcp/dhcpd.conf
ddns-update-style interim;
default-lease-time 600;
max-lease-time 7200;
authoritative;
log-facility local7;
subnet 192.168.1.0 netmask 255.255.255.0 {
range 192.168.1.5 192.168.1.150;
}
Reboot..., all should be all set!
Let's if that's true.
Run it
Connect the things first: Connecting the power supply will boot the device. Now, wait a couple of seconds for Linux to boot, and we are going to connect to the Raspberry PI from another machine, usingssh.
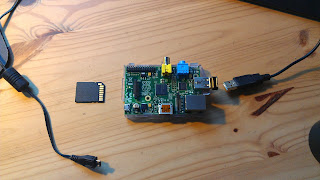
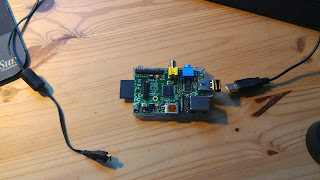
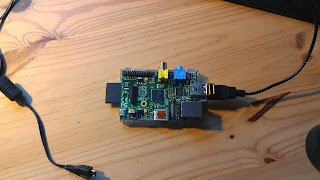
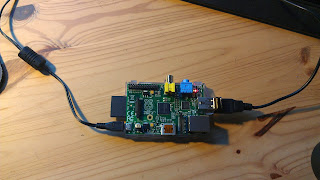
Notice in the steps above, that there is no mouse, no keyboard, and no screen connected on the Raspberry PI. We could have done so. But we didn't.
To demonstarte the full compatibility of this scenario, we will do the subsequent operations from a Windows box.
Connect to the Raspberry PI's ad-hoc network
The wireless networks are usually available in the Windows taskbar. If not, open your Network Control Panel, you'll find it there. Notice the network's name (RPiOnTheBoat), this is the one you defined.Then, we will use ssh (PuTTY) to start the re-broadcast: Connect with your username (default: pi) and password (default: raspberry), and cd to
olivsoft, and start the script olivsoft:
Prompt> ./olivsoft
It's on its way! You can leave the session if you wish, the process will keep going.
To stop it:
Re-connect on the Raspberry PI with
ssh
Find the process, by typing:
Prompt> ps -ef | grep java
Then send it a SIGTERM signal:
Prompt> kill -SIGTERM 2493
Where 2493 is the process id. This way, the process will shut down nicely (by design, it understands that signal, which would be a Ctrl+C from the command line).
The process being up and running, define a network connection in OpenCPN: Notice the Address, the one you have defined.
Click Apply... See the top right, the GPS is connected. As you can see in the NMEA log.
You can connect like this with as many devices as you want.
Voilà!
Next, we will try with the full NMEA station, with Pi4j. Then the HTML5 console will also be available, from http://192.168.1.1:9999/html5/console.html.

Saturday, October 26, 2013
Investigating the Raspberry PI
The more I play with it, the more I like it...
It's so small - and so cheap - and it is a real Linux system, based on Debian.
It comes with Java. It runs from a small SD card (4Gb recommended minimum).
All the info are available on the Raspberry PI web site.
The GPIO can be managed with PI4J, works like a charm. Example:
Next:
The GPIO can be managed with PI4J, works like a charm. Example:
---------------------------------------------------- HARDWARE INFO ---------------------------------------------------- Serial Number : 00000000a36c8782 CPU Revision : 7 CPU Architecture : 7 CPU Part : 0xb76 CPU Temperature : 49.8 CPU Core Voltage : 1.2 MIPS : 697.95 Processor : ARMv6-compatible processor rev 7 (v6l) Hardware Revision : 000e Is Hard Float ABI : true Board Type : ModelB_Rev2 ---------------------------------------------------- MEMORY INFO ---------------------------------------------------- Total Memory : 459505664 Used Memory : 240529408 Free Memory : 219484160 Shared Memory : 0 Memory Buffers : 20328448 Cached Memory : 141778944 SDRAM_C Voltage : 1.2 SDRAM_I Voltage : 1.2 SDRAM_P Voltage : 1.23 ---------------------------------------------------- OPERATING SYSTEM INFO ---------------------------------------------------- OS Name : Linux OS Version : 3.6.11+ OS Architecture : arm OS Firmware Build : 4f9d19896166f46a3255801bc1834561bf092732 (clean) (release) OS Firmware Date : Sep 1 2013 23:31:02 ---------------------------------------------------- JAVA ENVIRONMENT INFO ---------------------------------------------------- Java Vendor : Oracle Corporation Java Vendor URL : http://java.oracle.com/ Java Version : 1.7.0_40 Java VM : Java HotSpot(TM) Client VM Java Runtime : Java(TM) SE Runtime Environment ---------------------------------------------------- NETWORK INFO ---------------------------------------------------- Hostname : raspberrypi IP Addresses : 192.168.1.251 FQDN : raspberrypi.att.net Nameserver : 192.168.1.254 ---------------------------------------------------- CODEC INFO ---------------------------------------------------- H264 Codec Enabled: true MPG2 Codec Enabled: false WVC1 Codec Enabled: false ---------------------------------------------------- CLOCK INFO ---------------------------------------------------- ARM Frequency : 700000000 CORE Frequency : 250000000 H264 Frequency : 0 ISP Frequency : 250000000 V3D Frequency : 250000000 UART Frequency : 3000000 PWM Frequency : 0 EMMC Frequency : 100000000 Pixel Frequency : 108000000 VEC Frequency : 0 HDMI Frequency : 163683000 DPI Frequency : 0The first goal will be to have such a device running in the chart table, reading the NMEA Data (connected on the NMEA Station through its serial port, read with GPIO, as mentioned above), and re-broadcasting the data on HTTP, TCP or UDP. The re-broadcasting part has been tested (see here), with logged data.
Next:
- Connect the serial port, and read it from Pi4J
- Create an ad-hoc network FROM the Raspberry PI
Wednesday, August 21, 2013
South California Free Anchorages
Working on it. There is this site, quite interesting, and I'm trying to use Google Maps as well.
View Free anchorages in a larger map
Subscribe to:
Posts (Atom)